
Your kid is staring at a screen again. You’ve tried sending them outside. They last three minutes and come back in. You want them to actually play outside, not just stand in the yard.
A mud kitchen fixes that.
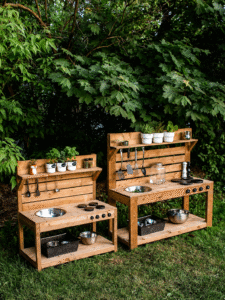
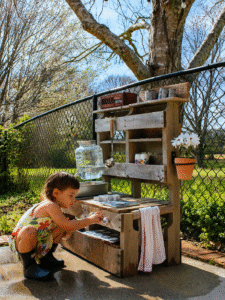
It’s an outdoor play space with a work surface, a couple of bowls for water, some pots, and a spot to hang spoons. Kids mix mud, pour water, make “soup” with leaves and pebbles, and stay busy for hours. Not minutes. Hours.
And you can build one this weekend for under $100.
This guide shows you exactly how. You’ll learn what materials to buy, what to skip, and how to put it together step by step. No woodworking experience needed.
source : @imaginationstations.ca
What Is a Kids Mud Kitchen (And Why Do Kids Love It So Much)?
Picture your 4 year old stirring a pot of mud, leaves, and pebbles. They’re completely absorbed. No asking for snacks. No asking for a tablet. Just playing.
That’s what a mud kitchen does.
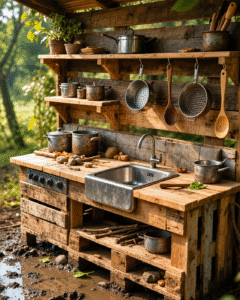
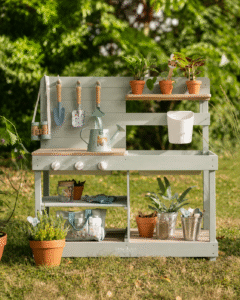
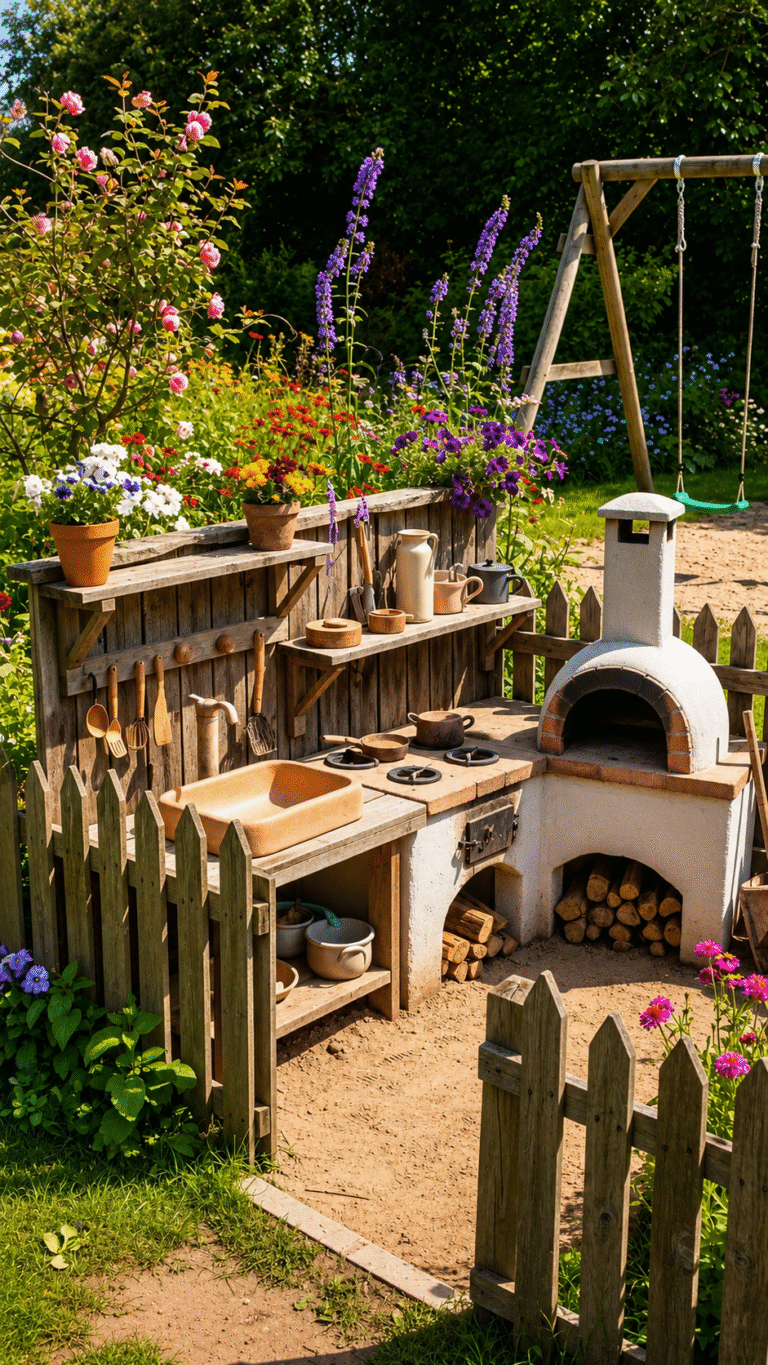
It’s a simple outdoor structure with a countertop, one or two sink bowls, a shelf underneath, and hooks on the sides. Kids use it with real kitchen tools like muffin tins, colanders, and wooden spoons. They fill the bowls with water and mix in dirt, sand, leaves, flowers, and whatever else they find outside.
The play is open ended. There are no rules. Your kid makes up the game.
Here’s why it works so well. Early childhood researchers have been studying this kind of play since at least 2012, when Jan White and Liz Edwards published a free guide called Making a Mud Kitchen for International Mud Day. That booklet helped bring mud kitchens into schools and backyards around the world.
The science behind it is real. Soil contains a microorganism called Mycobacterium vaccae. Studies suggest it can act as a natural mood booster and may help strengthen the immune system. Research also points to what’s called the “hygiene hypothesis”: kids who grow up in overly clean environments may have a higher risk of allergies and autoimmune problems.
Getting dirty is actually good for them.
And the outdoor play benefit is just as clear. A 2023 Japanese study tracked 885 children between ages 2 and 4. It found that kids with higher screen time had lower scores in communication and daily living skills. But here’s the key part: outdoor play helped reduce those effects. Getting kids outside matters.
A mud kitchen works for ages 2 to 10 and sometimes older. One parent who built hers says her 2 year old used it from day one, and her 10 year old still plays with it.
You don’t need woodworking skills or a big budget. Most families build one in a single weekend for under $100.
What You Need to Build a DIY Mud Kitchen
Most families spend $60 to $100 total. That covers the wood and hardware. You can bring the cost of kitchen tools to nearly zero by hitting thrift stores first.
Choosing Your Wood: Cedar vs. Pressure Treated
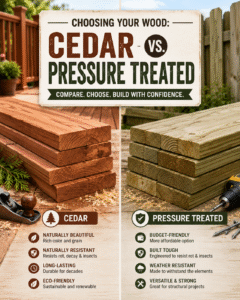
This is the first decision. Two options work well.
Cedar is naturally rot resistant. No chemicals needed. It smells good, looks warm, and is easy to work with. Cedar fence boards are cheap and work great for the countertop and shelves. The downside: cedar 2x4s can be pricier than pine.
Pressure treated lumber is pine or spruce soaked in preservatives to resist rot, fungus, and insects. It costs 30 to 50% less than cedar. Modern pressure treated wood uses copper based chemicals, not the arsenic based ones that were phased out in 2003. It’s safe for residential use with normal handling. The downside: it can warp slightly as it dries and doesn’t look as nice.
The best approach for a mud kitchen: Use pressure treated 2x4s for the frame and legs (they touch the ground or get the most weather exposure). Use cedar boards for the countertop and shelves (where kids’ hands actually go). You get durability where it counts and a nicer surface where it matters.
Materials List for a Standard Single Sink Build
2×4 lumber, 8ft lengths: 4 to 5 pieces (frame and legs)
1×6 boards, 8ft lengths: 5 to 7 pieces (countertop, shelves, backsplash)
3 inch outdoor screws: one box of 50+
2 large stainless steel mixing bowls (these become your sinks)
Exterior wood stain or child safe exterior paint
Polyurethane topcoat for weather protection
Outdoor screw in hooks: 6 to 8 hooks
Wood glue (optional but helps joints stay strong)
Tools You Need
Drill and driver
Jigsaw (for cutting the sink holes)
Speed square
P220 grit sandpaper
💡 Pro Tip: Don’t own a saw? Home Depot and Lowe’s will cut lumber for you at the store for free or a very small charge. Bring your cut list and you walk out with everything ready to assemble.
What to Get for Free or Cheap
Skip expensive plastic toy kitchen sets. They break fast and kids lose interest. Use real kitchen tools instead.
Check thrift stores, garage sales, Facebook Marketplace, and dollar stores for:
Muffin tins and baking trays
Colanders and strainers
Wooden spoons, ladles, spatulas
Measuring cups and pitchers
Funnels and small pots
Real tools make the play feel more authentic. They also last longer in the mud.
Cost breakdown:
Wood and hardware: $60 to $100
Kitchen tools (thrifted): $0 to $30
Total: under $100 in most cases
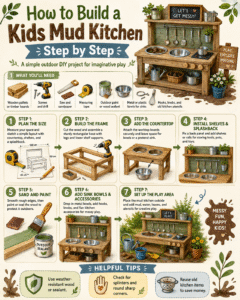
How to Build a Kids Mud Kitchen Step by Step
Plan for a 4 to 6 hour Saturday morning. The build has 7 steps. Most of the hands on work happens in Steps 2 through 4.
Step 1: Choose Your Dimensions
A standard mud kitchen is:
48 inches wide (good for 2 to 3 kids at once)
20 inches deep
22 to 24 inches tall at the counter
40 inches tall including the backsplash
The most important measurement is counter height. It should be at your child’s elbow height when they’re standing. That way mixing and pouring feel natural and easy.
Ages 2 to 3: 20 to 22 inch counter height
Ages 4 to 7: 24 to 26 inch counter height
Ages 7 and up: 28 inches works well
If you have kids of different ages, build for the youngest and add a step stool for older ones.
Step 2: Cut Your Lumber
Here’s a basic cut list for a single sink build:
| Piece | Size | Quantity | Use |
|---|---|---|---|
| Legs | 2×4 x 22″ | 4 | Corner supports |
| Side rails | 2×4 x 20″ | 4 | Front, back, side frame |
| Back braces | 2×2 x 44″ | 2 | Top and bottom back |
| Countertop | 1×6 x 48″ | 3 to 4 | Main work surface |
| Bottom shelf | 1×6 x 44″ | 2 to 3 | Storage shelf |
| Backsplash | 1×6 x 48″ | 2 | Vertical back panels |
Take this list to the hardware store. Ask them to cut everything to length. You save time and avoid the biggest beginner obstacle.
Step 3: Build the Frame
Start with the base frame. This is the rectangular box that holds everything.
Lay out the four side rails in a rectangle.
Drive two 3 inch screws into every joint.
Use a speed square to check each corner is exactly 90 degrees. This matters. A frame that isn’t square will cause problems later.
Attach the four legs to the inside corners of the frame using 3 inch screws from two directions.
Add 2×2 cross braces across the back top and bottom. Use pocket hole screws. Put the pocket holes on the back side so they’re hidden.
⚠️ Common Mistake: Skipping the speed square. Even a small angle off at the frame level means nothing lines up later. Take 2 minutes to check every corner before you drive the final screws.
Once the frame is square and solid, the rest of the build goes quickly.
Step 4: Add the Countertop and Bottom Shelf
Lay your 1×6 countertop boards across the top of the frame. Leave a small gap (about 1/8 inch) between boards so water can drain.
Apply a thin line of wood glue along the top rail, then place each board.
Drive 2.5 inch screws through the boards and into the side rails.
Do the bottom shelf last. It’s easier to reach the screw angles once the countertop is in.
Sand all edges and corners with P220 grit sandpaper. Pay extra attention to corners where kids lean and reach.
Step 5: Cut the Sink Holes
This is the step most first time builders slow down on. Here’s exactly how to do it.
Set your mixing bowl on the countertop where you want it.
Trace the outside rim of the bowl with a pencil.
Draw a second, smaller circle about 1 to 1.5 inches inside the first circle. This inner circle is where you cut.
Drill a starter hole anywhere inside the inner circle. Make it big enough to fit your jigsaw blade.
Insert the jigsaw blade into the hole and cut along the inner circle.
Test fit the bowl. The lip should rest on the countertop and the bowl should drop in snugly.
Mixing bowls vary in size, so always trace your specific bowl. Don’t just guess.
Step 6: Add the Backsplash and Hooks
Stand two or three 1×6 boards vertically along the back of the frame to create the backsplash. Screw them into the back braces.
Then add hooks:
Screw outdoor hooks into the sides and backsplash for hanging pots, spoons, and tools.
Optional: drill small holes and install wooden cabinet knobs as fake “stove burner knobs.” Kids love turning them.
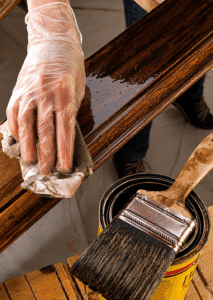
Step 7: Sand, Stain, and Seal
Don’t skip this step. It’s what makes the difference between a mud kitchen that lasts 2 seasons and one that lasts 10 years.
Sand the entire structure one last time, including the cut edges.
Apply one to two coats of exterior stain or child safe exterior paint. Let each coat dry fully.
Apply one coat of exterior polyurethane over the stain as a topcoat.
Let it cure for 24 to 48 hours before kids use it.
When that final coat dries, you’ve built something your kids will use for years.
Where to Put It and How to Set It Up
Location makes or breaks how much your kids actually use it. One parent at Backwoods Mama tried three different spots before finding the right one. She tried near the sandbox, against a rock wall, and along the deck. The winner? Right next to the back door.
That’s not surprising. The easier it is for kids to get to, the more they use it.
3 things that matter most for placement:
Close to the back door. If it’s at the far end of the yard, it becomes “out of sight, out of mind.” Near the door means they use it every day.
Shade. A shaded spot keeps play comfortable on hot days and prevents the wood from baking in direct sun all year.
Near the hose. Water is half the fun. Make refilling easy.
One more thing: put it on flat ground. If you’re using a lot of water, the soil underneath gets saturated fast. Lay pavers, gravel, or even a rubber mat underneath to keep the area from turning into a muddy puddle.
Water Setup Options
No running water (easiest): Fill the sink bowls using a watering can or hose. Most families do this. It keeps things simple and teaches kids to use water carefully.
Running water: You can reroute a garden spigot to add a real working tap. It looks great. But unlimited water access creates overflow fast, and standing water in summer breeds mosquitoes. If you go this route, empty the bowls after each play session.
Rain barrel: Set a barrel nearby to collect rainwater. Kids can ladle from it themselves. It’s a good way to introduce basic water conservation.
What to Stock It With
Skip the plastic toy kitchen sets. Use real, thrifted tools. They hold up in the mud and make play feel real.
Tools:
Muffin tins and baking trays
Colanders and strainers
Wooden spoons, ladles, funnels
Measuring cups and pitchers
Small pots and sauce pans
Natural ingredients:
Soil and sand
Pebbles and small rocks
Pinecones, leaves, flower petals
Herbs like mint or rosemary (they smell amazing in “soup”)
Seasonal additions to keep things fresh:
Summer: ice cubes, fresh mint, flower blossoms
Fall: dried leaves, acorns, cinnamon sticks
Winter: snow, frozen leaves, pinecones
Spring: flower petals, fresh herbs, dandelions
Rotating seasonal ingredients keeps the mud kitchen feeling new without buying anything new.
Storage tip: Put open laundry hampers on the bottom shelf for tools. At clean up time, kids dump everything into the bins. Hose off the surface. Done in 2 minutes.
How to Keep Your Mud Kitchen Standing for Years
This is not a high maintenance project. One afternoon a year is all it takes.
Re stain or re seal the wood once a year for cedar. Every 2 years for pressure treated.
Tighten any screws that have worked loose.
Sand and refinish any spots that look dry or gray. That gray color means the wood is drying out.
Winter care:
You can leave it outside all year if it’s properly sealed. One builder in Ohio does this and her mud kitchen is still standing after several years.
Throw a tarp over it during winter months if you want extra protection.
Empty the sink bowls before the first frost. Water expands when it freezes and can crack the bowl or warp the countertop.
Summer tip:
Don’t leave standing water in the sinks for several days in a row. It becomes a breeding spot for mosquitoes.
Cleaning is simple. Hose it down after play. Don’t bother sanitizing it. The outdoor dirt is normal and fine. That’s part of the point.
A well built, properly sealed mud kitchen realistically lasts 5 to 10 years with basic care. And the kids who outgrow it often hand it down to younger siblings.
Build It This Weekend
A kids mud kitchen is one of the best things you can add to your backyard. It’s cheap, it lasts, and it works. Kids who have one play outside more. They stay off screens longer. And they build skills they actually need, like measuring, pouring, problem solving, and creative play.
You don’t need to be a carpenter. You need a drill, a jigsaw, a few boards, and a Saturday morning.
Start with your materials list this week. Pick up the lumber Saturday morning. By Saturday afternoon, your kids could be stirring their first batch of mud soup.
Building a kids mud kitchen takes one weekend. The play it creates lasts years.
Leave a Reply