Epoxy has become a go-to material for home decor enthusiasts and DIY lovers alike. This versatile resin can seem intimidating at first, but once you dive in, you’ll discover a world of creativity waiting for you. I created this post because I’ve seen so many stunning epoxy projects that inspire anyone looking to enhance their living spaces. If you’re someone who loves home decor and enjoys crafting, you’re in for a treat!
In this guide, you’ll explore the many ways epoxy can transform your home. From breathtaking epoxy river tables to beautiful custom coasters, the possibilities are endless. I’ll share practical tips and creative ideas that are fun, colorful, and perfect for anyone wanting to add a personal touch to their space. So, grab your tools, and let’s unleash your creativity with epoxy!
Key Takeaways
– Understanding Epoxy: Epoxy is a resin that hardens into a durable surface, making it perfect for various projects in home decor.
– Creative Uses: Discover how epoxy can be used in making stunning river tables, coasters, wall art, and jewelry, allowing you to express your unique style.
– DIY Appeal: The DIY aspect of epoxy projects means you can customize every piece to fit your home’s aesthetic and your personal tastes.
– Functional Decor: Beyond aesthetics, many epoxy creations serve practical purposes, such as serving trays and desk accessories, blending beauty with functionality.
– Getting Started: This guide provides step-by-step advice and tips for beginners, ensuring you feel confident in your epoxy crafting journey.
Contents
- 1. Epoxy River Tables: Nature Meets Art
- 2. Custom Epoxy Coasters: Fun and Functional
- 3. Epoxy Wall Art: A Splash of Color
- 4. Epoxy Jewelry: Wear Your Art
- 5. Epoxy Serving Trays: Perfect for Entertaining
- 6. Epoxy Furniture: A Modern Touch
- 7. Epoxy Keychains: Small & Stylish
- 8. Epoxy Candle Holders: Glow Up Your Space
- 9. Epoxy Desk Accessories: Function Meets Fun
- 10. Epoxy Home Decor Accents: The Finishing Touch
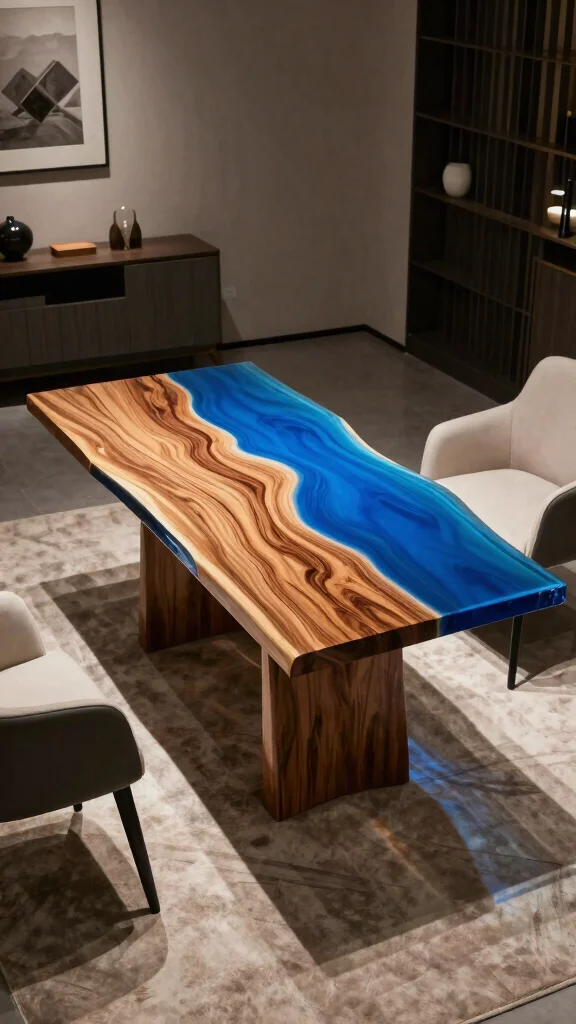
1. Epoxy River Tables: Nature Meets Art
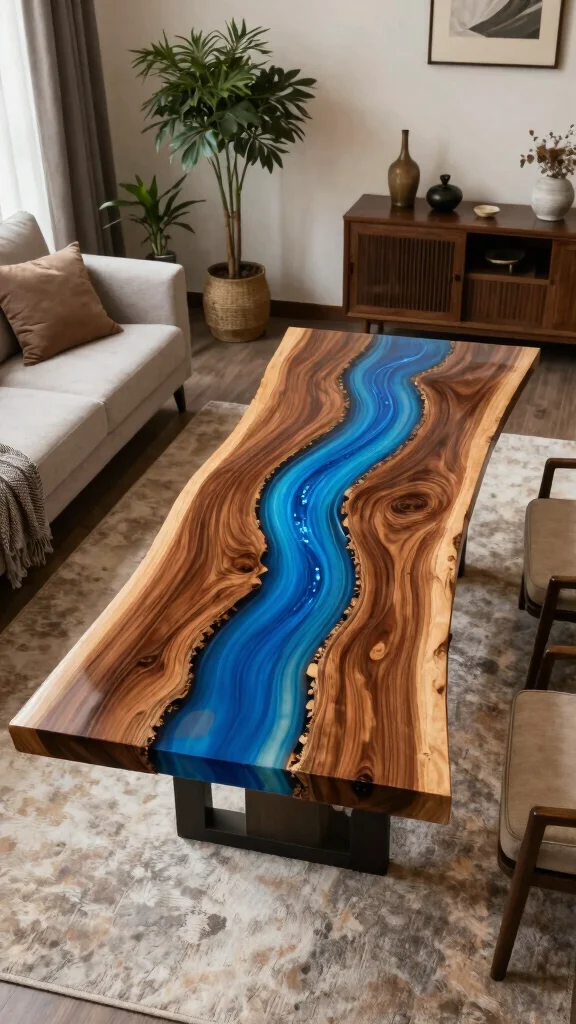
Epoxy river tables beautifully blend the organic charm of wood with the striking allure of epoxy resin. This captivating combination creates a visual harmony that feels both modern and timeless. Imagine a table featuring a live-edge wooden slab, seamlessly filled with deep blue or lush green epoxy, evoking the tranquil essence of nature flowing through your living space.
To craft your own river table, start with a unique piece of wood that boasts interesting grain patterns. Use painter’s tape to outline where the epoxy will flow, and carefully mix and pour the resin into the designated areas. Patience is key as the mixture cures, transforming your hard work into a stunning centerpiece.
Consider these tips to enhance your river table project:
– Pair contrasting epoxy colors to highlight the wood grain.
– Use a heat gun to remove bubbles before curing.
– Sand and polish the surface for a flawless finish.
This artistic endeavor not only showcases the beauty of nature but also adds a distinct touch to your home decor.
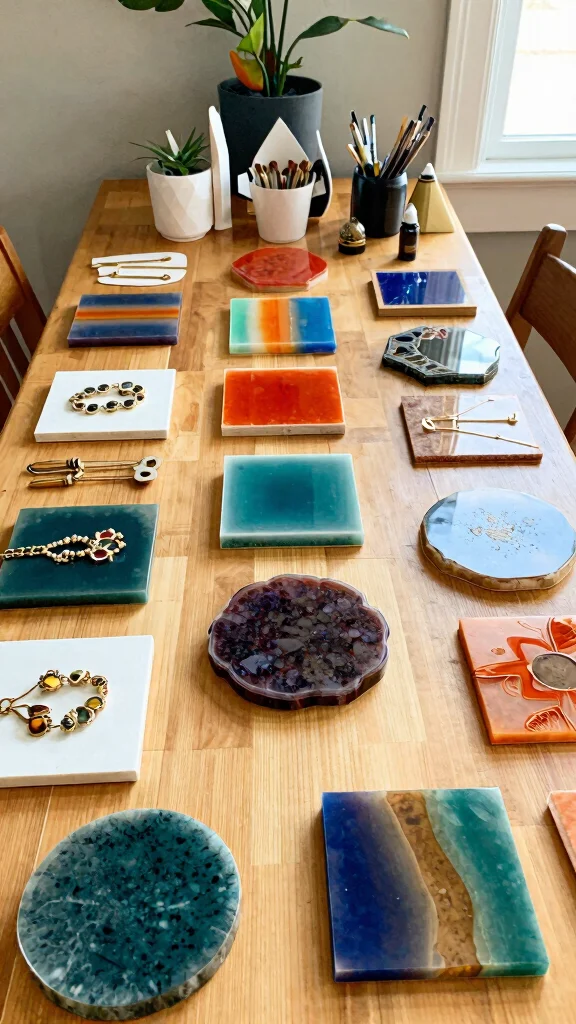
2. Custom Epoxy Coasters: Fun and Functional
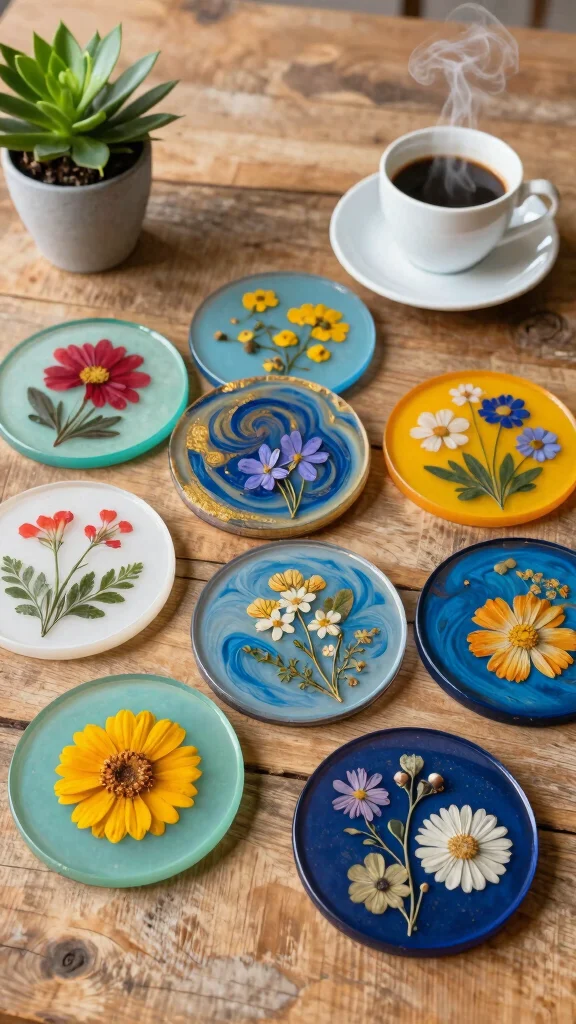
Personalized epoxy coasters are a delightful way to add a splash of creativity to your home. These practical items can reflect your style while protecting surfaces from drink rings. Imagine coasters adorned with your favorite colors, pressed flowers, or shimmering glitter, making them both functional and eye-catching.
To create your own, gather silicone molds in shapes that resonate with you. Mix the epoxy resin, infuse your chosen colors or decorative elements, and pour the mixture into the molds. Once cured, you’ll have unique coasters that are perfect for entertaining or gifting.
Follow these simple steps to make your coasters:
– Gather molds, epoxy, and decorative items.
– Mix the epoxy according to instructions.
– Pour into molds, adding decorations as desired.
– Allow to cure for at least 24 hours.
– Remove from molds and sand edges for a smooth finish.
Enhancing your coasters with a clear epoxy layer can add durability and a glossy finish, ensuring they remain beautiful for years to come.
3. Epoxy Wall Art: A Splash of Color
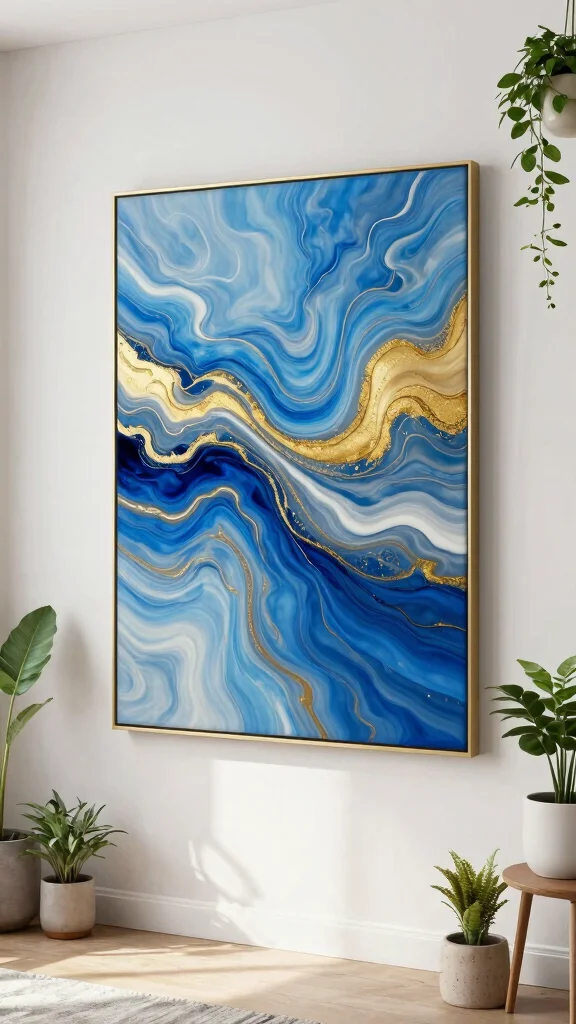
Infuse your walls with color and creativity through epoxy wall art. This trendy decor option allows you to express your style while adding a modern touch to any room. Whether you create abstract designs or serene landscapes, epoxy transforms your wall into a stunning focal point.
Begin by selecting a canvas board and envisioning your design. Prepare your epoxy by mixing in vibrant pigments, including bold reds and calming blues. Pour the resin onto the canvas, adjusting it to achieve the desired effect as colors blend and swirl together, resulting in breathtaking art.
To create your own wall art, follow these steps:
– Select a canvas board and lay it flat.
– Prepare your epoxy resin and mix in desired pigments.
– Pour resin onto the canvas, using a stick to create patterns.
– Allow to cure fully before hanging.
For added depth, consider layering epoxy to create a mesmerizing 3D effect that enhances your artistic expression.
4. Epoxy Jewelry: Wear Your Art
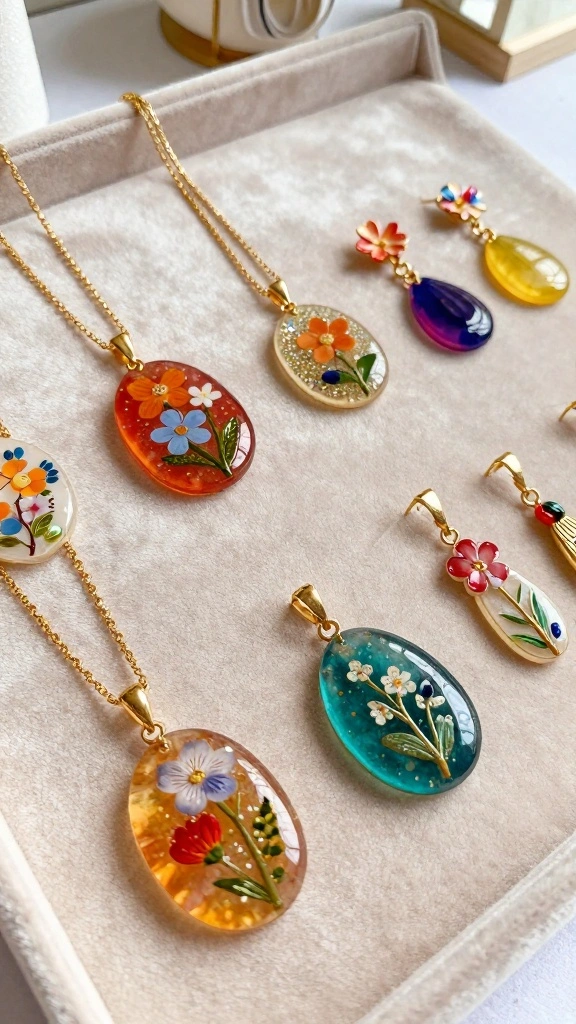
Create stunning handcrafted epoxy jewelry that merges artistry with fashion. From necklaces to earrings, these unique pieces allow you to showcase your personality and style. You can embed items like dried flowers or colorful glitter, turning each piece into a wearable masterpiece.
Start by selecting silicone molds shaped like your desired jewelry pieces. Mix your epoxy resin, add decorative elements, and pour it into the molds. This creative process not only results in beautiful accessories but also provides a fun way to express yourself through fashion.
Here’s how to craft your jewelry:
– Gather silicone molds, epoxy resin, and decorations.
– Mix the epoxy according to instructions and pour into molds.
– Allow it to cure completely, usually around 24 hours.
– Once cured, attach findings like hooks or chains.
Experimenting with different color layers can yield a unique effect, making your jewelry truly one-of-a-kind.
5. Epoxy Serving Trays: Perfect for Entertaining

Elevate your entertaining game with custom epoxy serving trays that blend beauty and functionality. These trays not only serve delicious snacks and drinks but also double as stunning decor pieces when not in use. The combination of colors and embellishments can truly reflect your personal style while impressing your guests.
To craft your serving tray, select a wooden or metal base and pour epoxy over it, incorporating colors or decorative items as desired. This simple DIY project offers endless creative possibilities, making it easy to enhance any gathering.
Follow these steps to create your serving tray:
– Choose a base material that suits your style.
– Mix your epoxy, adding pigments or small decorative items.
– Pour the epoxy evenly over the base.
– Allow to cure completely before using.
Adding handles can enhance both practicality and style, making your tray easy to carry while serving your guests.
6. Epoxy Furniture: A Modern Touch
For a striking focal point, epoxy furniture is a fantastic choice. This innovative approach transforms ordinary pieces like chairs and tables into extraordinary works of art. By merging wood with vibrant epoxy colors, you can design furniture that is both functional and visually stunning.
Begin by selecting the furniture piece you wish to enhance and deciding where to add epoxy. Prepare the surface thoroughly, ensuring it’s clean and ready for application. Mixing and pouring the epoxy into desired areas opens up endless creative possibilities for your design.
Here’s how to create your epoxy furniture:
– Choose the furniture piece and plan your epoxy application.
– Clean and prepare the surface for optimal adhesion.
– Mix and pour epoxy into designated areas, using color for added effect.
– Allow to cure and finish as needed.
To achieve a smooth finish, consider using a heat gun during the process to eliminate bubbles and ensure a flawless result.
7. Epoxy Keychains: Small & Stylish
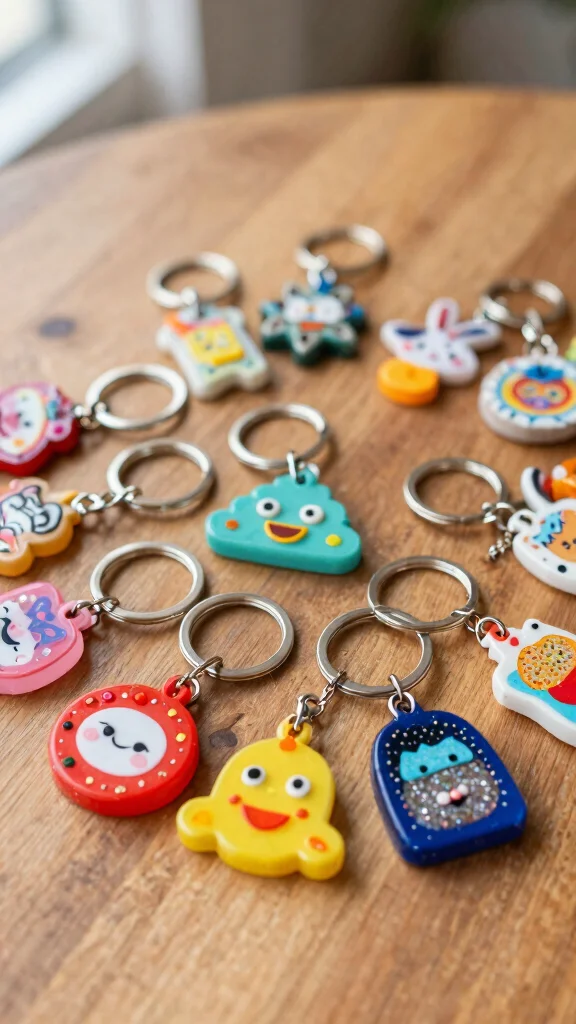
Crafting epoxy keychains is a delightful way to create small accessories that reflect your personality. These quick and easy projects make perfect gifts or party favors while allowing you to showcase your creativity. Embedding charms, pictures, or initials into the resin adds a personal touch that makes each keychain unique.
To create your keychain, use small silicone molds and mix your epoxy with colors and decorative elements. This fun project is a great way to express your artistic flair in a compact form.
Follow these steps to make your keychains:
– Gather small silicone molds, epoxy, and decorations.
– Mix your epoxy and pour into molds, adding embellishments.
– Let them cure completely, then attach key rings.
Experimenting with various shapes and colors allows you to create themed keychains for holidays or special occasions, adding joy and personality to everyday items.
8. Epoxy Candle Holders: Glow Up Your Space
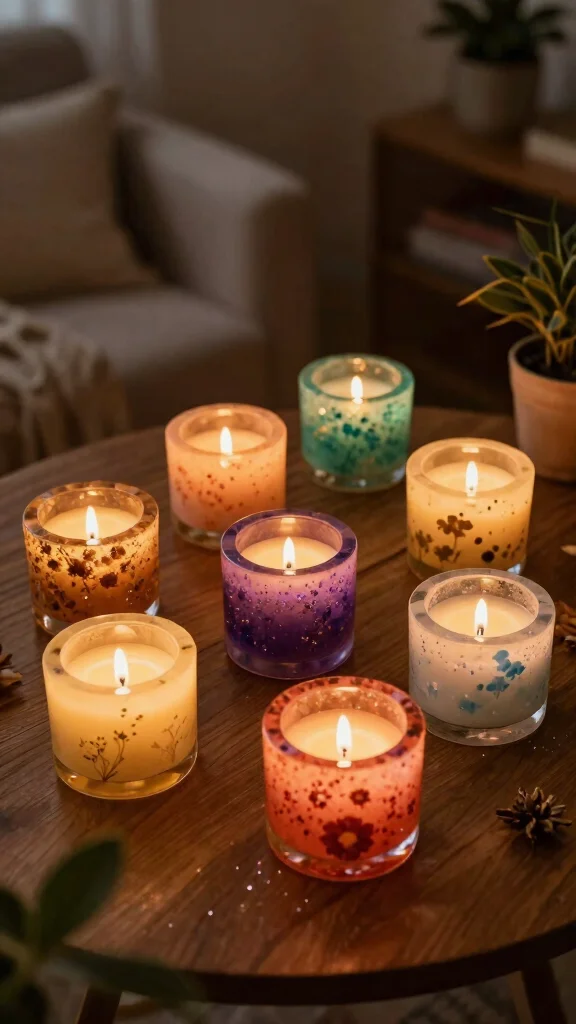
Enhance your home decor with beautiful epoxy candle holders that combine functionality with artistry. These holders can be shaped in various forms and colors, perfect for creating a warm and inviting atmosphere in any room. They not only hold candles but also serve as striking decorative accents.
To make your candle holders, use molds to shape the epoxy while adding colors or decorative elements that resonate with your style. After curing, you’ll have unique pieces that enhance the ambiance of your space when paired with lit candles.
Here’s how to create your candle holders:
– Select molds that fit the size of your candles.
– Mix your epoxy and pour it into molds, adding colors for effect.
– Wait for the epoxy to fully cure before using.
Consider applying a clear coat of epoxy for added shine and durability, ensuring your candle holders remain beautiful for years to come.
9. Epoxy Desk Accessories: Function Meets Fun
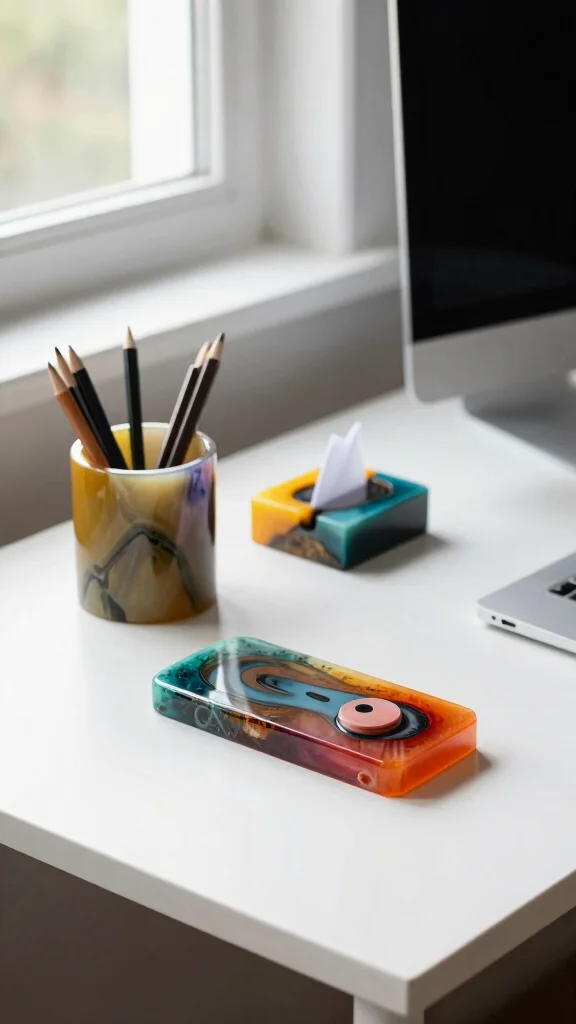
Revitalize your workspace with stylish epoxy desk accessories that blend function and flair. From pen holders to paperweights, these items bring a splash of color while keeping your desk organized. They not only serve practical purposes but also reflect your personal taste and creativity.
Creating epoxy desk accessories is a fun way to add character to your work environment. Customize your items with vibrant colors, glitter, or embedded objects that inspire you, creating a workspace that feels uniquely yours.
Follow these steps to craft your desk accessories:
– Select molds based on your accessory needs.
– Prepare your epoxy and mix in colors or glitter.
– Pour the epoxy into the molds and allow for curing.
– Once hardened, remove from molds and enjoy your creations!
Coordinating colors with your office decor can create a cohesive and inviting look, making your workspace a source of inspiration.
10. Epoxy Home Decor Accents: The Finishing Touch
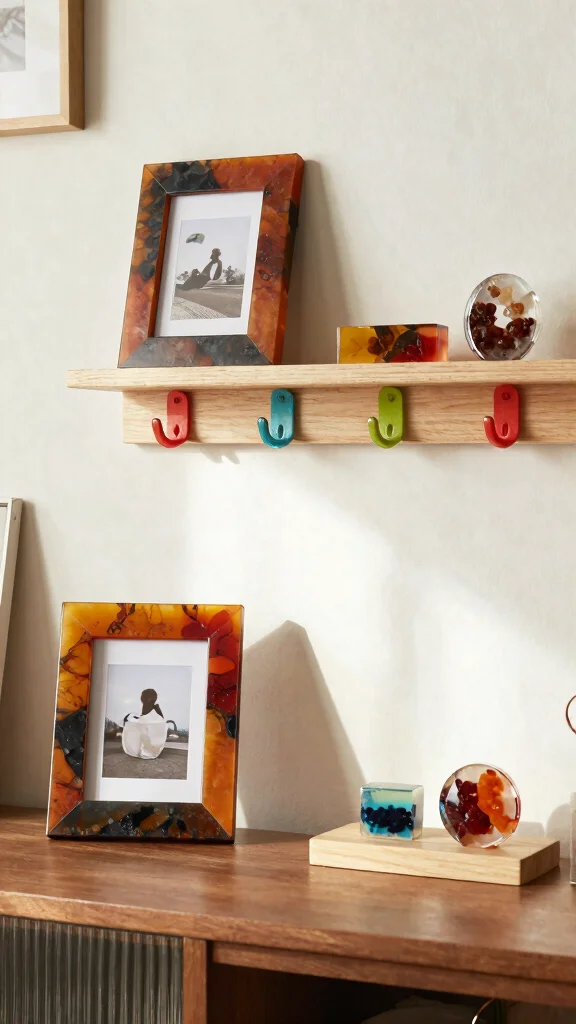
Small epoxy accents can significantly enhance your home decor. Consider adding epoxy elements to picture frames, shelf decor, or key hooks to create personal touches that elevate your space’s overall aesthetic. These charming additions allow you to refresh older items while showcasing your unique style.
When incorporating epoxy accents, think about colors and styles that complement your existing decor. This approach is perfect for those looking to make impactful changes without overwhelming their space, making it an excellent choice for beginner DIYers.
Here’s how to add epoxy accents to your decor:
– Choose an item to enhance, such as a picture frame.
– Mix your epoxy and add pigments or glitter for effect.
– Apply the epoxy evenly onto the item.
– Allow to cure fully before displaying.
Using contrasting colors can make your accents stand out, drawing attention to your cherished decor pieces and creating a harmonious look.
Conclusion
The creative possibilities with epoxy are truly endless! From furniture to jewelry, this versatile material allows you to express your artistic side while adding functionality to your home decor. Whether you’re a seasoned DIYer or just starting, there are projects that cater to all skill levels. So, why not embrace the world of epoxy and bring your unique vision to life? Go ahead, unleash your creativity and make something beautiful today!
Frequently Asked Questions
What is epoxy and why is it popular for home decor and resin art?
Epoxy is a two-part resin and hardener that, when mixed, cures into a clear, durable coating. It’s incredibly versatile for DIY, home decor, and resin art because you can pour it in layers, embed pigments, and achieve a glossy, durable finish.
To get started, choose a resin system labeled for DIY or home decor, check the pot life and cure time, and keep the work area at a steady temperature.
Prep your surface with a clean, dust-free base, measure the correct ratio exactly, mix slowly to avoid air bubbles, and use a heat gun or torch to pop surface bubbles. Always wear gloves and safety goggles and follow the manufacturer’s safety guidelines.
What are beginner-friendly epoxy projects for home decor you can start with today?
Great starters include DIY epoxy coasters, decorative trays, resin paperweights, and simple wall art or tabletops with a shallow pour.
Start by laying out a clean surface, mixing your epoxy per the ratio, and adding small amounts of pigment or glitter for color. Pour in thin, even layers, pop any bubbles with a heat gun, and let each layer cure before adding the next.
These home decor projects are perfect for building confidence in resin art and expanding into bigger epoxy ideas later.
How can I avoid common epoxy problems like bubbles, yellowing, or cracking?
Prevention is your best tool. Work in a warm, dust-free space (ideally 65–75°F), measure accurately, and mix slowly to minimize air pockets.
Pop bubbles with a light pass of a heat gun or torch between layers, and use a UV-resistant or clear top coat to reduce yellowing from light exposure. For cracking, apply in thin, even layers and avoid rapid temperature changes or selling the epoxy under heavy stress.
Always follow the product’s instructions and consider doing a small test piece before a big project.
Is epoxy safe for food contact or kitchen surfaces, and how should I seal it?
Many epoxies aren’t food-safe once cured, and heat or scratching can compromise the surface. If you need a food-contact surface, choose a resin system specifically rated for food contact and follow the manufacturer’s guidance.
For kitchen use, consider using a separate food-safe sealant or applying epoxy only as a thin, well-sealed top layer with no direct contact with raw foods. Always cure fully in a well-ventilated area and avoid direct heat sources.
When in doubt, treat epoxy surfaces as non-edible and use cutting boards or protective coatings for dining areas.
How do I choose the right epoxy for DIY and resin art projects and what tools should I have on hand?
Look for an epoxy with a forgiving pot life and clear, non-yellowing results. For resin art, consider a system labeled for long working times and high clarity.
Must-have supplies include measuring cups, wooden stir sticks, silicone molds or a flat surface, protective gloves, goggles, and a thermometer to monitor temperature. Have a heat gun or torch handy to remove bubbles, and stock pigments, pigments powders, or dyes for color. A level surface and a silicone spreader will help you achieve even pours.
Start with a small test piece, read the label, and follow safety guidelines to ensure a successful epoxy project for your home decor and resin art goals.